
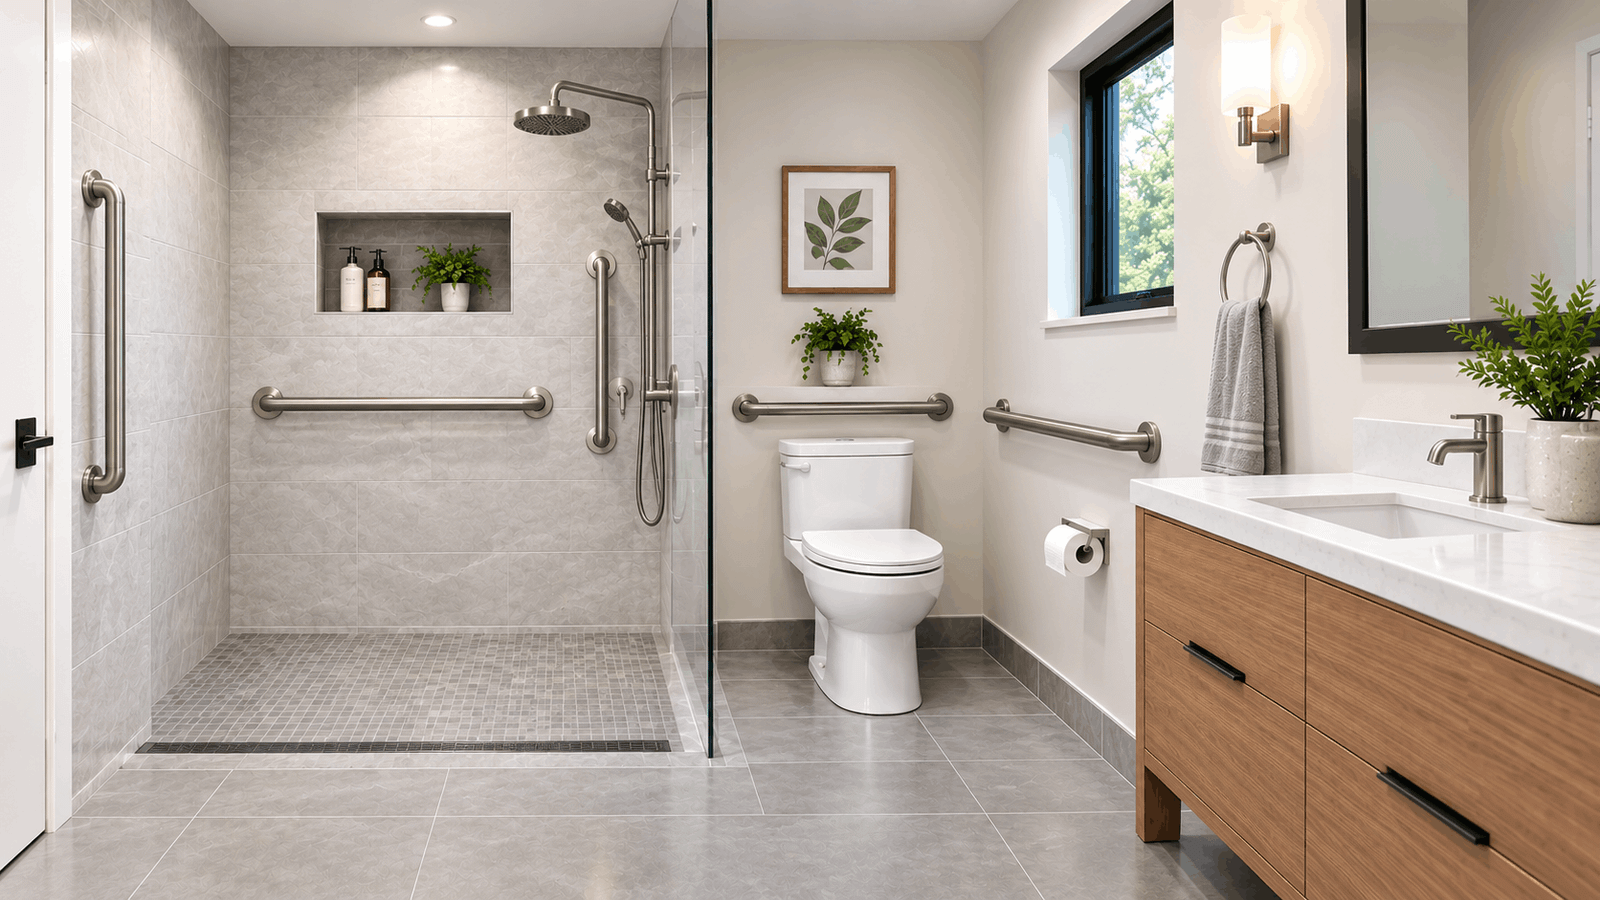
You’re standing in your new walk-in shower, or looking at blueprints for one, and realizing that “install grab bars” isn’t as simple as it sounds once there’s no tub wall to anchor to. Without a curb or ledge as a reference point, the usual advice—”put one near the entrance”—doesn’t tell you much. Here’s exactly where the bars go and why walk-in showers need a different layout than a standard tub.
Quick Answer: A walk-in shower typically needs three to four grab bars: a vertical bar at the entry point, a horizontal bar along the main wall at 33–36 inches, a bar near the shower controls, and—if there’s a built-in bench—an angled bar beside the seat. Every bar must anchor into a wall stud or blocking, not drywall alone.
Table of Contents
What You Need to Know
- Walk-in showers need placement logic built around the open entry, not a tub wall—there’s no curb to reference.
- The ADA mounting height range (33–36 inches to the top of the bar) is the standard most residential installers still use, even though it’s not legally required in a private home.
- Bars must anchor into studs or blocking behind the wall surface—mounting into tile or drywall alone is the single most common failure point.
- Glass panels and half-walls change where a bar can physically go, and most placement guides ignore this entirely.
- A built-in bench changes the math: it adds a fourth zone that a standing-only shower doesn’t need.
Why Walk-In Showers Need Different Placement Than a Tub
A tub gives installers a fixed reference: the wall at the entrance, the wall along the tub’s length, and the wall at the faucet end. A walk-in shower—especially a curbless or zero-threshold one—often has one continuous open wall and a glass panel or half-wall instead of a tub lip. The entry bar in a walk-in shower supports someone stepping over a flat, wet, unmarked threshold, not a raised edge, which is a different fall risk than stepping over six inches of tub wall.
That distinction matters because most placement guides written for “tub and shower” combos default to tub logic—a vertical bar at the tub wall and a horizontal bar along the tub’s long side—and never address what happens when that wall doesn’t exist.
The Entry Zone: Vertical Bar Placement
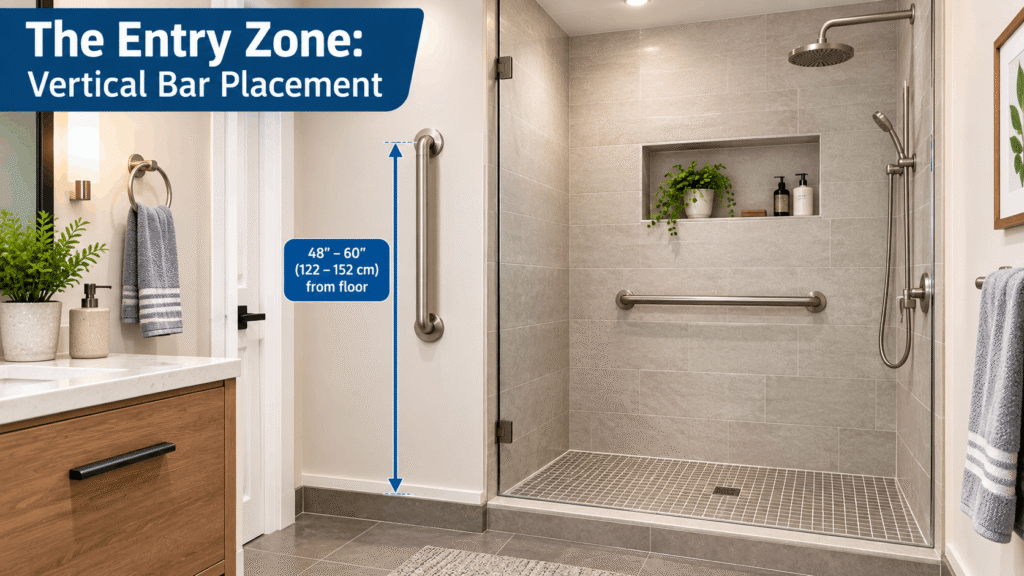
A vertical grab bar belongs at the point where the person transitions from a dry floor to a wet shower floor, mounted on whichever wall is closest to that transition line. In a curbless shower, this is usually the wall nearest the shower’s opening, positioned so a hand can reach it before the foot crosses onto tile.
Mount the bottom of a vertical entry bar around 36 inches above the floor and let it run upward 18 to 24 inches, giving a hand something to grab at multiple heights during the step-in motion. For a full breakdown of vertical bar height and orientation, see our vertical grab bar placement guide.
The Wall Zone: Horizontal Bar Placement
The horizontal bar along the main shower wall is the one used most during the actual shower, not during entry or exit. It should run parallel to the floor, be mounted between 33 and 36 inches high, and be positioned within easy reach of wherever the person stands while washing.
A 24- to 36-inch bar is the standard length for this zone in a walk-in shower. Longer walk-in showers—anything over 36 inches wide—often need this bar to run the full usable wall length rather than stopping at a fixed 32-inch standard, since the person may shift position across a wider floor. Our zone-by-zone placement guide covers how this compares to placement in a full bathroom layout, including near the toilet and vanity.
The Control Zone: Bar Near the Shower Valve
A short grab bar or an extension of the main horizontal bar near the shower valve gives support during the moment someone reaches to adjust water temperature—a common point of imbalance, especially for anyone shifting weight onto one foot to reach a control mounted low or off to the side.
This zone is frequently skipped in generic placement guides because tub/shower combos put the controls at a predictable spot near the tub spout. In a walk-in shower, valve placement varies more, so this bar needs to be positioned based on where your specific valve sits, not a fixed measurement.
The Seat Zone: Placement Around a Built-In Bench
If the walk-in shower includes a built-in bench or fold-down seat, it needs its own bar—this is the zone tub-focused guides mention only briefly, if at all. An angled grab bar beside the seat supports the sit-down and stand-up motion, which uses a different muscle path than standing and washing.
Mount an angled bar so the lower end sits roughly at seat height (typically 17–19 inches) and the upper end reaches toward standard bar height (around 33–36 inches), giving a changing hand position through the full motion of sitting or rising.
Special Case: Glass Panels and Half-Walls
Most walk-in showers use a glass panel or a tiled half-wall instead of a full wall at the entry, and neither surface can safely hold a structural grab bar on its own. A grab bar cannot be mounted directly into glass—it needs a solid, stud-backed wall section nearby, even if that means placing the entry bar a few inches further from the actual opening than feels intuitive.
If the layout doesn’t leave a solid wall section within reach of the entry point, a floor-to-ceiling pole-style bar (mounted to the floor and ceiling rather than a side wall) is the standard workaround contractors use, since it doesn’t depend on wall-stud placement at all.
Grab Bar Zone Reference Table
Zone Bar Orientation Height Anchoring Note Entry Vertical, 18–24″ long bottom at ~36″ Must hit a stud; use a pole-style bar if no solid wall is within reach of the main wall. Horizontal, 24–36″ long, 33–36″ Center of grip surface in ADA range controls Horizontal or short bar 33–36″, positioned at valve Anchor near valve blocking if present. Seat/bench angled 17–19″ at seat, 33–36″ at top. Anchor into bench framing or adjacent stud.
Save or screenshot this zone reference table—it covers the placement logic for entry, wall, control, and seat zones in one layout you can bring to a contractor or hardware store.
ADA Height and Anchoring Specs
The industry-standard mounting height for a grab bar’s gripping surface is 33 to 36 inches above the floor, measured to the top of the bar, per the U.S. Access Board’s 2010 ADA Standards, Chapter 6. This range isn’t legally required in a private residence, but it’s the reference number most installers, contractors, and accessible-design professionals build to regardless.
The same standard specifies a bar diameter of 1¼ to 2 inches, a wall clearance of 1½ inches, and a minimum of 12 inches of clearance above the bar to the nearest obstruction. Anchoring matters as much as height: a bar mounted only into drywall, tile backer, or a fiberglass shower surround without hitting a stud or blocking behind it will eventually fail under real weight, regardless of how well the height was measured. For the full breakdown of these numbers and how they apply room-wide, see our standard height for a grab bar guide and complete ADA overview.
Grab Bar Placement for Elderly Users
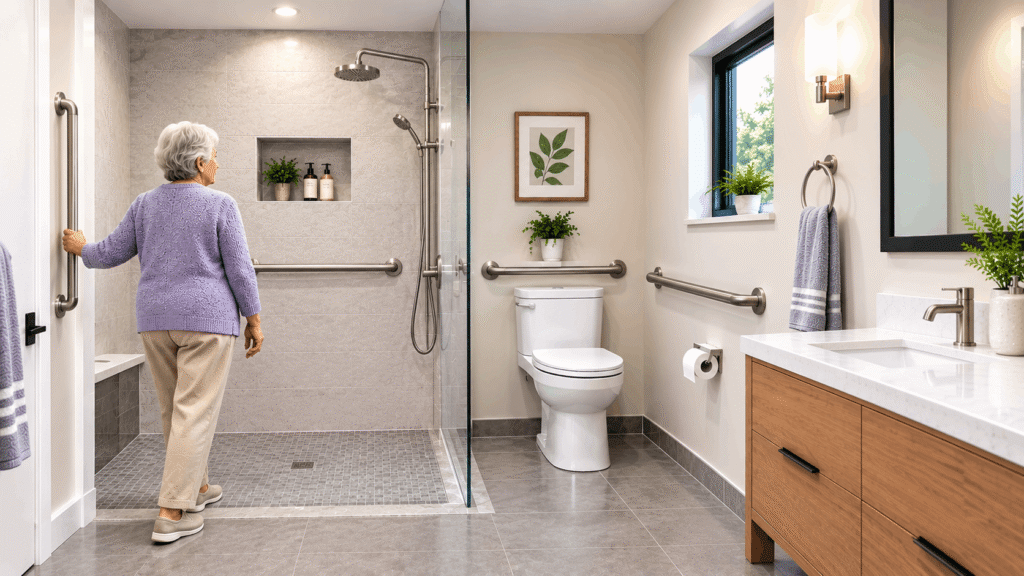
Placement for an elderly user should account for reduced grip strength and slower transitions, not just standard height. That often means adding a bar at the toilet and near the vanity in addition to the shower zones above, since the walk to and from the shower carries its own fall risk.
According to a CDC study published in the Morbidity and Mortality Weekly Report, roughly two-thirds of bathroom injuries happen in or near the tub or shower, and injury rates climb sharply with age. That pattern is the reason accessible-design guidance treats the shower as the highest-priority zone in the room, even when a full bathroom grab bar plan covers more ground.
For a user who showers seated rather than standing, shift the main wall bar and control-zone bar downward toward seat height—roughly 24 to 28 inches—rather than keeping them at the standard 33–36 inch range built for a standing adult.
Common Placement Mistakes
The most common failure is anchoring into drywall or tile alone instead of a stud or blocking, which can let a bar pull loose under real weight exactly when it’s needed most. A close second is installing only one bar, usually at the entry, and skipping the wall and control zones entirely—leaving no support for the parts of the shower routine where most time is actually spent.
A third mistake specific to walk-in showers: mounting the entry bar based on where it “looks right” rather than where the actual wet-to-dry transition line falls, which can leave the bar out of reach at the exact moment it’s needed.
FAQ
Where should grab bars be placed on the wall in a walk-in shower?
Grab bars go at the entry point (vertical), along the main shower wall (horizontal, 33–36 inches), and near the control valve. Each bar must be mounted into a wall stud or blocking, not drywall or tile alone, to hold real weight safely.
How should a wall-mounted grab bar be installed in a walk-in shower?
A wall-mounted bar needs its screws driven into solid wood blocking or a stud behind the shower surround, using the mounting flange’s full screw pattern. If no stud falls where the bar needs to go, a contractor typically adds blocking behind the wall before the surround goes up or uses a specialty anchor rated for the bar’s full weight capacity.
Is there a diagram for shower grab bar placement?
The zone reference table above lays out bar orientation, height, and anchoring notes for the entry, wall, control, and seat zones of a walk-in shower—a text-based version of the diagram most placement guides show only as an image.
Where should grab bars be placed for elderly bathroom users?
Where should grab bars be placed for elderly bathroom users?
Beyond the shower’s entry, wall, and control zones, elderly users generally benefit from an additional bar near the toilet and one near the vanity, since the walk to and from the shower carries its own fall risk. Bars for seated showering should sit lower, around 24–28 inches, rather than the standard 33–36 inch range.
How many grab bars does a walk-in shower need?
Most walk-in showers need three to four bars: one at the entry, one along the main wall, one near the controls, and a fourth angled bar if there’s a built-in bench or seat. Larger or curbless showers sometimes need a longer main-wall bar to cover a wider standing area.
Can a grab bar be mounted on a glass shower panel?
No. Glass panels can’t structurally support a grab bar. The bar needs to go on an adjacent solid, stud-backed wall section, or a floor-to-ceiling pole-style bar can be used when no wall section falls within reach of the entry point.
What to Do Next
Once the zone layout is set, the next step is confirming the exact mounting height for each bar against the people who’ll actually use the shower—see the standard height guide for how to adjust the 33–36 inch range up or down. If the plan needs to meet a formal accessibility standard rather than just good practice, the ADA grab bars overview covers the full spec sheet. And if the shower is just one part of a larger bathroom safety plan, the zone-by-zone bathroom guide extends this same logic to the toilet and vanity areas.